
Today's tutorial is the easel card, which has been a staple at SCS for the last year or so! There is an awesome tutorial by Beate there as well. I love this card style because it's perfect for displaying one of your favorite images, and very easy to make!
Here is what you'll need:
One 4 1/4" x 11" piece of cardstock
One 4 1/4" square piece of cardstock
Scoring tool
Adhesive
Additional cardstock & designer paper for card inside and card front
Stamps or Digistamps
Ink, Coloring Tools and Embellishments
Step1:
Start out with a 4 1/4" x 11" piece of cardstock and score at 5 1/2" and 8 1/4".
Prefold all score lines (mountain, then valley).

Step 2:
Add adhesive to the 2 1/8" x 4 1/4" section of the large piece of cardstock, facing up. Add the 4 1/4" cardstock square to the card base, lining up the top of the square with the top of the 2 1/8" x 4 1/4" section.
This will create the "easel" in your easel card!


Step 3:
Decorate the inside of your card, being sure to add an extra layer or embellishment towards the bottom to help your card stand.

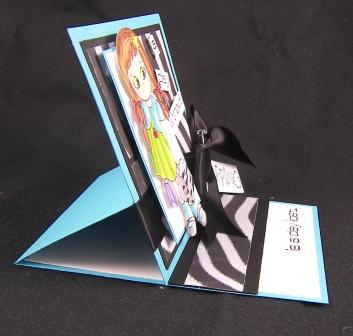
Tah Dah!
Thanks to Sheri for the color scheme inspiration!
Have a great day!
2 comments:
Thank you for posting this tutorial. I have been wanting to make one of these cards and have not had the directions.
MShady
I LOVE this blog!!!
Hugs Viv xxx
Post a Comment