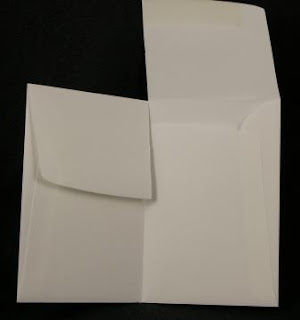
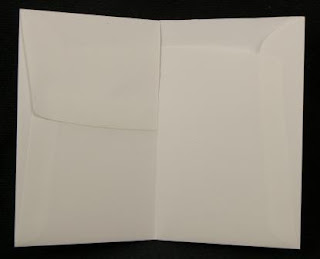
You know I like to show you all the quick and easy stuff and today's tutorial is no different! This is a gift card holder that is so fast and easy that you can make it in minutes.
Here is what you'll need:
One Envelope (I used the invitation size)
Stamps or Digistamps
Cardstock and Designer Paper (Optional)
Adhesive
Ribbon
Step 1:
Fold your envelope in half, with the flap to the inside of the fold.
Step 2:
Step 3:
Lick (or use adhesive) to adhere the left portion of the flap down to the envelope. Cut and remove the right portion of the flap.
Step 4:
Add ribbon for use as a closure if desired. Stamp and add embellishments to finish!
Easy peasy, right?
My project features one of our new Geishas, Miyako Tea.


14 comments:
Oh my goodness, are you serious Nikki? There is no way that this is possible as it is the cutest idea ever!! Perfect, the end of the school year is soon approaching so I can whip these up for the teachers. THANK YOU!!
This is awesome, love it!
THIS IS A SMART IDEA! MORE ECONOMIC! LADYBUG1376@HOTMAIL.COM
Thank you, thank you, thank you! So simple, yet so smart and beautiful
Thank you, thank you, thank you! So simple, yet so smart and beautiful
This is WONDERFUL! I love the idea and THANK you for sharing it with us!!
Happy Crafting,
Lisa
How awesome....great idea.....thank you for sharing....
OMG...these are too cute, Nikki!! Can't wait to try them!!
Wow! What a clever idea! Thanks!!!
What a great idea. TFS.
Perfect timing. Have a b-day party this weekend and I was trying to think of a new idea for a card.Excellent idea. I can also use it for teachers gifts.
Oh my goodness! You are a genious! I would NEVER have thought of this! Love it! I think I would add a little glue to the left inside of the envie before sealing to keep the gift card from sliding over to that side when card is opened. My mind is just whirling...how can I adapt this idea to a wedding favor....hmmm.....Thanks for sharing this fantabulous idea!!!
Love this idea!
Very cleaver! Love the idea and image.
Post a Comment