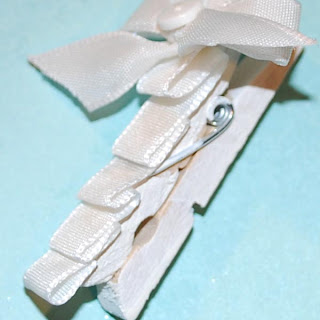
Today's tutorial from Melyssa is a cute little project that would be an adorable addition to a gift tag or maybe even to use as a page marker for a book you're reading!
You will need:
5 Small cloths pins
Really sticky tape
White paint and brush
Glitter
Ribbon
buttons
sand paper
Washi tape
First clip the pins onto a scrap piece of cardboard. This will keep them in place so you can paint them.
For best results remove the spring from the pins and paint, allow to dry and slip the springs back in place.
Vintage cloths pin-After the pins are dry take one and rub with sand paper to remove some of the paint.
Glitter cloths pin-Cut a strip of double sided tape, adhere to the top and bottom of cloths pin, peel off backing and add glitter.
Polka dot cloths pin-Grab your favorite Washi tape and add it to the pin.
When trying to trim off access stuff I always flip the item over and trim with my scissors.
Button Cloths Pin-Choose your buttons and line them up to the cloths pin. This will give you the best results as you will know how may buttons will fit.
**Don't forget to leave a space for the spring bar on the cloths pins.
Cut the double sided sticky tape to fit the cloths pin and adhere.
Peel off the backing and add the buttons.
Folded ribbon cloths pin-Add the sticky tape to the top of the cloths pin. Cut the ribbon about twice the length of the cloths pin.
Stick the ribbon onto the top of the cloths pin.
Fold the ribbon back to create loops.
Repeat
When you get to the end of your ribbon tuck it back onto the cloths pin.
Keep the folds flat and in place by adding a little glue under the folds and pressing them down.
Hold until the glue sets.
Add a little bow for a decorative touch.


1 comment:
Es una idea hermosa!!!!
cariños Debora
Post a Comment